I have just finished making some Polar Bears for Christmas orders so took some photos to create a tutorial.
Please let me know if you have any luck making one of your own.

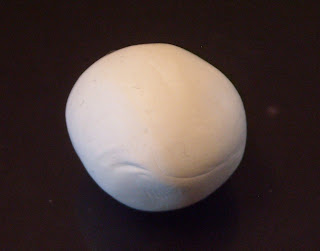
Firstly roll a ball of white fimo - size is up to you (this one is about 1.5")

Now taper to make a teardrop shape, then flatten base on worksurface- this will be the body.
Now roll a smaller ball (about 1 inch) this will be the head
Place ball on worksurface and push gently on both sides to for a "roundish" triangle shape.
Roll a smaller ball and cut in half this will make the ears (size is up to you) just add or take away clay until you get the size you want.
Position on either side of head and make indents with a rounded tool.
Now roll another small ball and reform into a "roundish" triangle - this will form the muzzle.
Position on front of head and blend into the face.
Take you time with this and try not to press too hard as you may squash the face.
If easier do this before you place the ears (it may be easier to recreate if it all goes horribly wrong!)
Now insert 2 holes where you would like the eyes to go (a coctail stick is useful for this if you don't have any ball tools!)
Insert to beads for eyes (if you don't have beads use black fimo rolled into balls (you can make and bake in advance if you prefer) Beads will bake perfectly in oven and won't melt.
You should now have a head and body
Now we will make the back legs.
Roll 2 balls (about .5 inch in size) into a tapered log shape. (you can use larger ball as you will trim the leg before you position it.

x 2
Now holding each leg gently, push down on fatter end with your thumb to form a foot - re roll the ball/tapered log as often as you need to make the correct shape (practice makes perfect!).
You should hopefully have 2 legs that look like this.
With a knife tool, form the toes.
Now cut the legs to size (if you made long legs) and position on either side of the body.
Press gently to fix in place.
Now for the arms, roll one (.5 inch) ball into a log shape and cut in half.
Now shape into a tapered log (similar to legs)
Lay flat on worksurface and push gently on larger end to flatten into a "paw"
Again use knife tool to create toes.
Decide how you want to place on body.
I find it easier to add one paw at a time and if easier place head on before the second paw.
Now roll a small ball for the tail -
and place on his behind.
Now we need black fimo for the pads and his nose.
Roll some black fimo into a log shape.
Cut 4 pads for each paw - one slightly larger than the others
Roll into balls and flatten, attach to paws - the larger ball at the bottom, the smaller on his toes.
Cut another ball and shape into a triangle for his nose and flatten.
Add nose to snout.
At this point you can add a small amount of blusher or pink eyeshadow to his cheeks (optional).
Now for the decoration, roll some green fimo and cut into basic leaf shapes. use a knife to score veins and a blunt tool to shape the leaves. Roll 3 small red balls for berries
Add to head and bake!

Enjoy!
Natalie
Hints and tips
If possible wear gloves (white clay gets dirty so easily) if not, wash hands as often as possible and make all white parts first.
Use a clean worksurface (baby wipes are great for cleaning between clay colours and for wiping your hands).
Re create if it doesn't go as planned (I often have to make bits more than once!)


